
Hints For Home Recording: Good Vocals In A Bad Room

Mike Metlay
Getting really good home recordings can be tricky when your space and budget are limited – but it’s by no means impossible. “Hints For Home Recording” brings you bite-sized bits of information that can help you take your recordings to the next level.
In this article, we’re going to take on a very common problem with musicians, podcasters, streamers, and anyone else trying to create the best possible product – getting the best possible vocals in a room that’s seemingly doing its best to ruin them.
Before we get to solutions, we first have to understand the problems, so we’ll start there. Read on!

Why is the human voice so important?
Of all the sounds that might exist in our environment, the human voice is the one that always grabs our attention and holds it. As social animals that communicate with our voices, we are acutely sensitive to every possible nuance of the human voice: loudness, tonality, expression, emotion, and all the subtle cues that help us identify the speaker or singer.
Unfortunately, that means that when we record the human voice, if something isn’t right, the audience will hear it – and if it’s bad enough, it will spoil their enjoyment and make them lose attention. Getting the best vocal will benefit most songs far more than nailing the sound of the guitar, bass, drums, or any other instrument (sorry, all you players out there).
Your room wasn’t designed for good audio
When architects design a house or an apartment building, room sound isn’t very high on their list of priorities. Not only is it not that important to most buyers, it’s difficult and expensive to do well – pro studio designers earn the big bucks for a reason!
Room acoustics could be the subject of another article (or a whole series of articles… hmmmm!), but for now let’s summarize the issues that a vocalist is likely to run into when recording in their home.
- Leakage: The list of problems for any home tracking session – whether for vocals or anything else – always begins with unwanted outside sounds getting into your recording. This could be anything from the HVAC kicking in at the wrong moment, to the dog barking, to that delivery truck driving by.
- Room artifacts: Acoustic issues like flutter echo, uncontrolled reflections, and uneven frequency absorption can and will affect the sound of your recordings, usually in unpleasant ways. Usually this requires taking the sound of the room out of the sound of the music.
- Mic-related problems: A good mic will pick up all manner of sounds – that’s what it’s designed for! However, this can also include sounds you don’t want, which need to be controlled if not eliminated outright.
- Signal chain problems: Sometimes even the best mic capturing the best signal won’t come out sounding that good. When that happens, you’re going to need to chase down other problems in the signal chain, just as part of good overall recording practice.
Each of these issues has at least a partial solution. Some of them require investing in appropriate gear, but others can be handled for free.
Dealing With Leakage
Sound loves traveling through solid matter even more than it loves traveling through air. If two objects are physically connected to one another (coupled), then vibrations in one will travel through the other. One of the reasons professionally designed studios are so expensive is that each room is actually a “room within a room,” where the workspace is acoustically isolated from the building structure with an air gap and special construction techniques. A conventionally designed building won’t have anything like this!
Studs, framing, drywall, and windows are all enemies of isolation. There are products and techniques that can sometimes lessen or deaden outside sound, but they can be expensive, difficult to install, or both – and they’ll never isolate as well as the salesmen claim they will. Keeping outside sounds completely out of your recordings is virtually impossible, unless you invest the money (and floor space) for an actual isolation booth.
So what can you do with outside sounds? Work around them!
Outside activity is most easily avoided when there’s less of it. Depending on where you live, that might mean recording at night, during the middle of the day when most of the folks in your neighborhood are at work or school, or just avoiding daily commute times. Turn off your HVAC, wait for the dog to go to sleep, and ask your family or roommates for some cooperation.
Capture your takes quickly and efficiently, so you don’t get clobbered with outside noise while you’re fumbling to get things right. Rehearse, set up your gear, and make sure all is well (aside from the leakage), then grab takes when the timing is right.
Oh, and thank your lucky stars if you don’t live in a city with freight trains blasting their horns at random times all day and night! (Don’t ask me how I know this.)
Dealing With Room Issues
Room acoustics problems range from subtle to horrible. If your room has two walls directly facing each other without anything on them, sound waves will bounce back and forth between them, creating flutter echo. This is in addition to unwanted reflections off your windows or other hard surfaces. The presence of furniture, bookshelves, a TV or big gaming monitor, etc., can cause further chaos.
The solution here is to isolate the mic – not from the outside world, but just from the acoustics issues within the room. You can make a “tent” of blankets over your mic stand, record in the closet… or take advantage of a handy little device called a reflection filter.
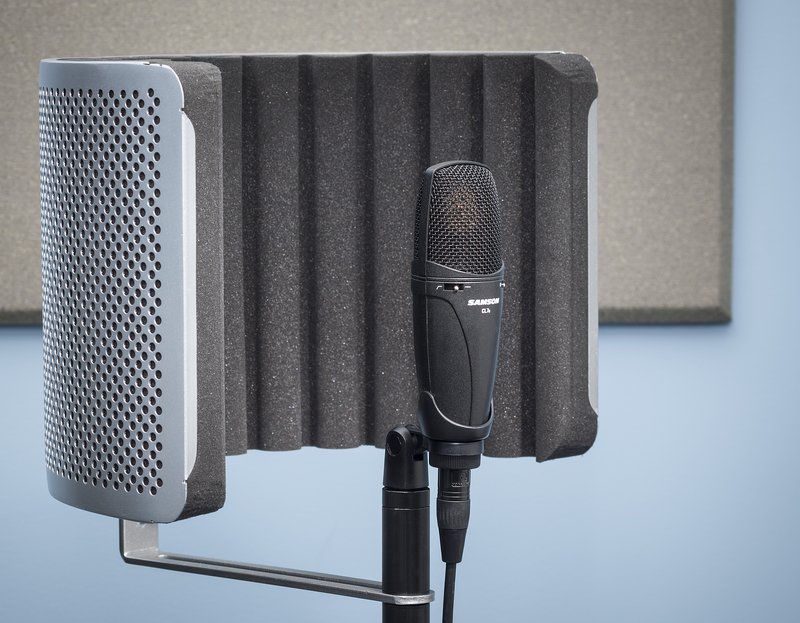
A reflection filter essentially creates a miniature “vocal booth” around your mic. You mount it on your mic stand, then mount the mic inside it, and the filter keeps room artifacts away from the mic. It can’t help with leakage, but it can do wonders with what your mic hears in the room itself.
Dealing With Mic-Related Problems
Microphones are sensitive beasts. They pick up all manner of stuff you don’t want, in addition to the sounds you’re aiming for. Fortunately, these problems are well understood, with solutions that you can almost always apply within your room and budget.
First of all, mics don’t like to be touched while you’re recording. Handling noise is a real issue, and even if you’re careful to avoid touching the mic itself while recording, there’s another kind of handling noise you might not be aware of.
Remember how we discussed sound vibrations traveling through coupled surfaces? That applies to your mic stand and whatever it’s sitting on or attached to, whether it’s the floor, your computer stand, or whatever. A tapping foot, a passing car five blocks away, a closing door elsewhere in the house… these vibrations get into the building, go straight up the mic stand, hit the mic, and cause low-frequency rumble.
Your first way to control rumble is to buy a quality mic stand! Portable stands with folding legs can be useful for recording really loud signals like kick drums or guitar amps, but for vocals you’ll want one with a good heavy base to help damp rumble before it ever gets to the mic.
If you’re recording voice for a stream or podcast, this is critical. A good heavy desktop mic stand can make the difference between a nice clean voice and one that’s constantly interfered with by thumps and bumps when you touch the table or anything on it – like your keyboard and mouse!
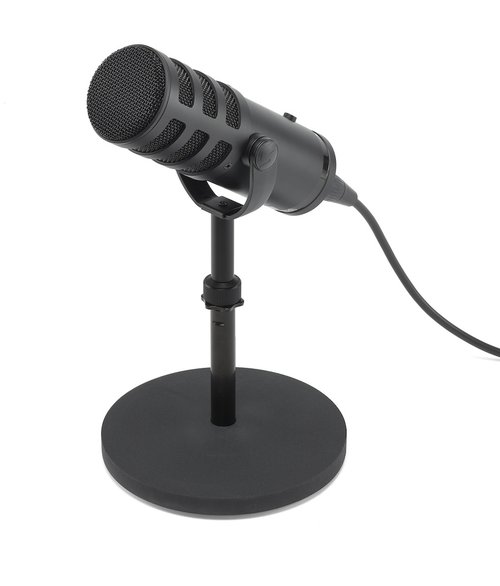
What if you’re using a microphone boom like the Samson MBA38, a common solution for home computer-centric recording setups? It’s coupled tightly to the table for a secure mount. Dealing with handling noise here involves a gizmo that’s found in pretty much any serious studio – a shockmount.

A shockmount is essentially a device that decouples the mic body from the stand, so the mic “floats” and never feels the rumble. The most common shockmounts use elastics that look a bit like a spider’s web – hence the nickname spider shockmount. Every mic intended for studio use will either come with a shockmount or be able to use one that’s readily available as an accessory. Get one and use it, even if you have a good solid mic stand.
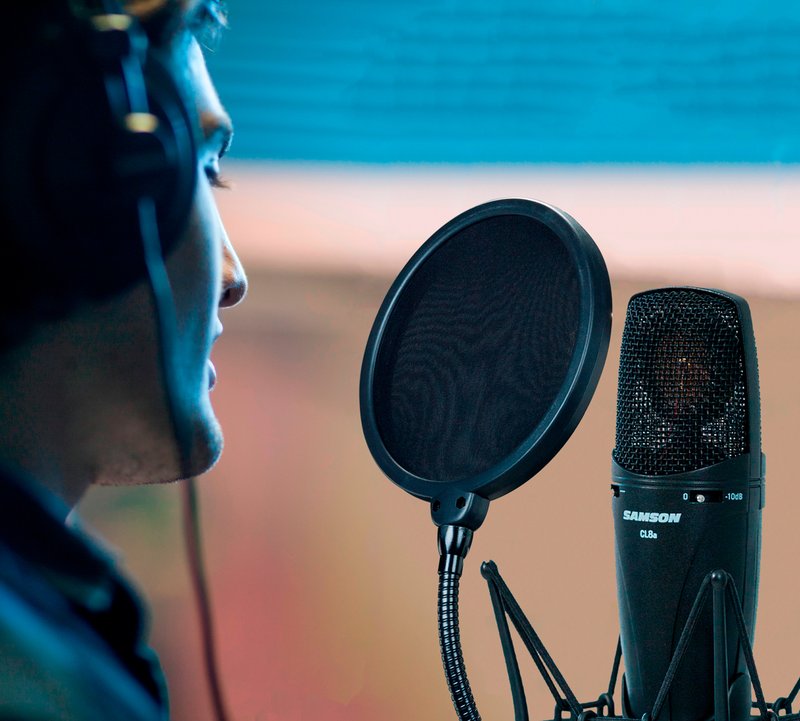
Beyond handling noise, the other problem sounds you’re likely to run into are plosives, also called “p-pops”. Words with sounds like ‘b’ and ‘p’ send puffs of air into the mic, which can overload its capsule and cause nasty popping noises. The solution to this is to stop the puff while letting the sound through, via a pop filter that’s placed between the vocalist and the mic.
Dealing With Signal Chain Problems
Finally, you need to think about the quality of the components between the microphone and your recording device. Even the best mic won’t sound good if it’s running into a signal chain that’s been compromised somehow.
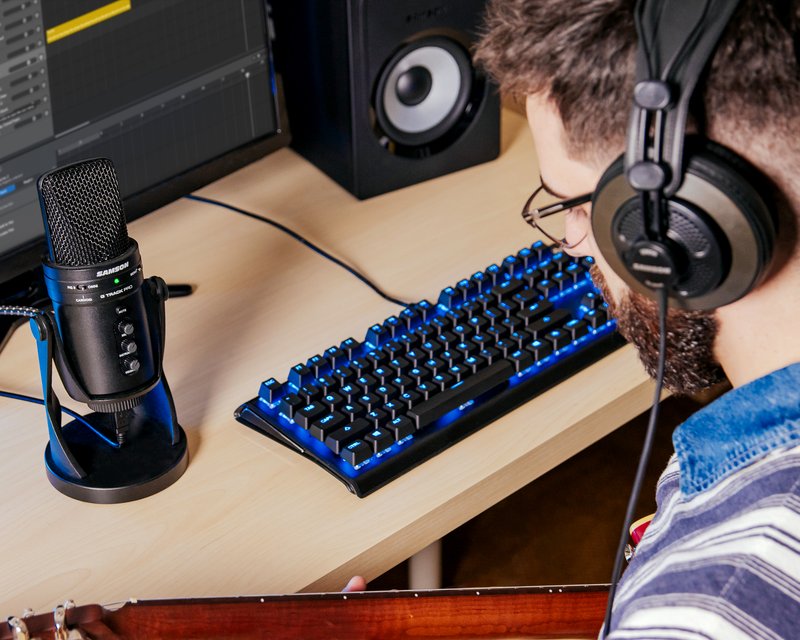
Sometimes this involves buying a better product – if you’re using a USB microphone as a self-contained solution, there’s no excuse for not having a really good one. In addition to mics that use an external shockmount, you can consider mics with well-made shockmounts designed into the body, like the Samson Q9U, or mics with heavy built-in stands like the G-Track Pro USB mic/interface.
Other times, controlling sound quality in the signal chain won’t be helped by throwing money at the problem. You’ll need to do some learning about gain staging and EQ, matching resolution and sample rate between your interface and your software – and knowing when to throw away a bad cable and replace it. There’s no substitute for common sense!
Make Room For Good Vocals
As you can see, none of these problems is impossible to deal with. Sometimes all it takes is a bit of forethought and planning, and other times there are simple and affordable solutions that will take your vocal recordings to the next level.
One last thing to remember: the most important part of this setup is the vocalist. You’ll get the best vocal recordings if you take care of your voice! Stay away from dairy-based foods on tracking day, don’t eat right before singing, keep yourself hydrated, take frequent breaks, and be well rehearsed before you put strain on your voice trying to nail a real take.
And above all, remember: if it sounds good, it is good!


About the Author