
Getting Started with a Home Recording Studio

Matt Vanacoro
Do you want to teach classes remotely? Start a podcast? Create music? For these activities (and a bunch of others too long to list) you’ll want to start assembling a home production studio. It used to be a pretty intimidating prospect, but these days the idea of a home audio/video recording/streaming setup is actually pretty simple. Here’s what you’ll need to get off the ground.
The Microphone
Choosing a microphone has a lot less risk than it used to. You don’t have to break the bank, you just need to have a solid plan for what your most common use case is. Microphones generally fall into one of two categories: Dynamic Microphones and Condenser Microphones; Mics can be analog (connect via an XLR cable), digital (connect via a USB cable) or they can even have both types connections.
USB microphones are wonderfully convenient, by incorporating analog-to-digital converters right in the microphone allowing you to connect and record directly to a computer with just a USB cable. But with this simplicity comes a trade-off, the nature of those devices and some software typically allow for using only one mic at a time. If you want to use multiple microphones or have more control over the signal before it enters the computer (e.g. with a dedicated audio interface or a mixer with effects), an analog microphone is the way to go. XLR has been the ‘mic cable’ standard for quite a long time. Its 3-pin system allows mics to connect to mixers, preamps, audio interfaces, and more. Setting up a system with XLR mics will require you to have an audio interface to convert your analog audio signal into a digital one that a computer can understand. Some mixers have an audio interface built-in specifically for this purpose, and that can certainly simplify things a bit.
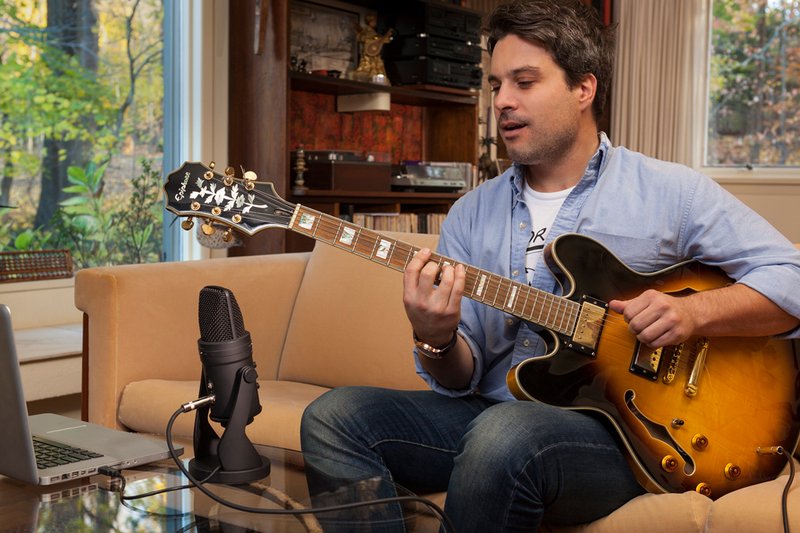
If you’re going to set up a computer for recording and have a ‘dedicated station’, I can think of no better choice than the Samson G-Track Pro. This condenser microphone can connect directly to your computer without an audio interface. You can plug a second sound source into the back of it, and it has three of pickup patterns* that make it a great choice for music, speech, voiceover, and more.
If you are working in an untreated room, or in an area with a lot of ambient noise, a dynamic microphone is your best choice. If you are going to use multiple microphones for a number of sound sources like instruments one day and a guest speaker the next, then have a look at the Q8x. This analog handheld dynamic microphone works great for picking up only what’s in front of it, and rejecting other noise/sounds in the room.
One more option is the Q9U, a dynamic broadcast microphone that will give you that ‘talk show host’ sound. The Q9U is also a hybrid mic, it can connect directly to your computer via USB or to a mixer with a standard mic (XLR) cable.

Condenser vs. Dynamic Microphones
Why would you choose one over the other? It depends on your situation.
Condenser microphones have a smooth, wide frequency response which makes them great for capturing the highs and lows of your voice. They are more sensitive than their dynamic counterparts and are great for capturing the small details and nuances of the voice. If you are in a live, noisy room unfortunately the mic will pick up some of that excess noise, however if you are in a room that doesn’t have a lot of ambient noise, your voice paired with a condenser mic will be the most natural and open sound you can get.

Dynamic microphones have a narrower frequency response than condenser microphones but this is not a bad thing, this smaller frequency is often associated with the rich, full sound of radio broadcasters. Reduced sensitivity means that you have to be closer to the microphone to capture the full sound of your voice but this comes with the advantage of rejecting more unwanted room noise. They can handle louder sources making it the better option for louder voices. Dynamic mics are also more rugged than condenser mics and are able to withstand the rigors of being on the road, getting dropped or living in the bottom of a backpack.
What are Microphone Pickup Patterns?
The most important characteristic of any microphone is its directionality or “pickup pattern”. A microphone exhibits its best frequency response when pointed directly at a sound source. There is no “ideal” pattern; the choice is often dictated by application.
Omnidirectional – Omnidirectional patterns pick up sound (generally) equally from all directions – in front of the mic, behind the mic, off to the sides, etc. Unlike with other directional patterns, omnidirectional microphones tend to have a smoother frequency response and no degradation of the sound as the vocalist moves “off-axis” from the front of the mic. Omnidirectional patterns are great for recording a number of people around a single microphone.
Cardioid – Also referred to as unidirectional, the cardioid (“heart-shaped”) pattern is the most commonly used pickup pattern. The cardioid pattern is most sensitive to sounds directly in front of the mic, and rejects sounds coming from behind the microphone. The cardioid provides better isolation from other performers sharing the stage. The tradeoff when using a cardioid microphone is that they have a more pronounced drop in bass response and fidelity when moving away from the center axis of the microphone.
Bidirectional – Figure-8, or bidirectional, patterns pick up sound directly in front and back of the microphone while rejecting the sound on the left and right sides. This can be an ideal setting for capturing a cross table interview.
The Audio Interface
If you are going the USB mic route, you can skip this paragraph — the audio interface is already built into the mic, You won’t need a separate device! If you are using a mic that utilizes a traditional microphone cable, then you’re going to need a device to convert the analog mic signal into a digital one that your computer can understand. This is called an audio interface. Audio interfaces come in a variety of offerings. You’ll want to think about how many mics you want to plug in (inputs), whether or not you’ll need to plug in 1/4” instruments, and how it connects to your computer (USB or Thunderbolt). Not all USB connectors are created equal, so be sure to check to make sure the device you’re looking at is supported by your computer!
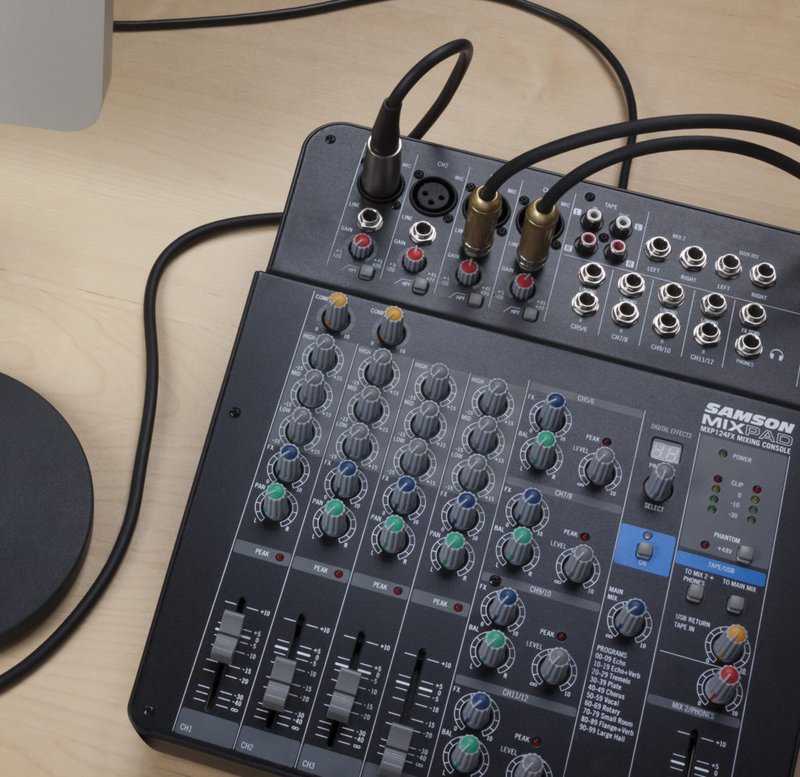
There are also audio mixers that have USB outputs for computer connectivity (the audio interface is built into the mixer). The Samson MixPad MXP Series mixers are another excellent way to plug in multiple microphones, adjust the levels and tone exactly how you want, and get their sound into your computer. The MixPad MXP offers a USB output allowing you need to plug in a bunch of microphones (don’t forget those mic cables!) and send the sound from the mics to your computer.
Hearing Your Sound
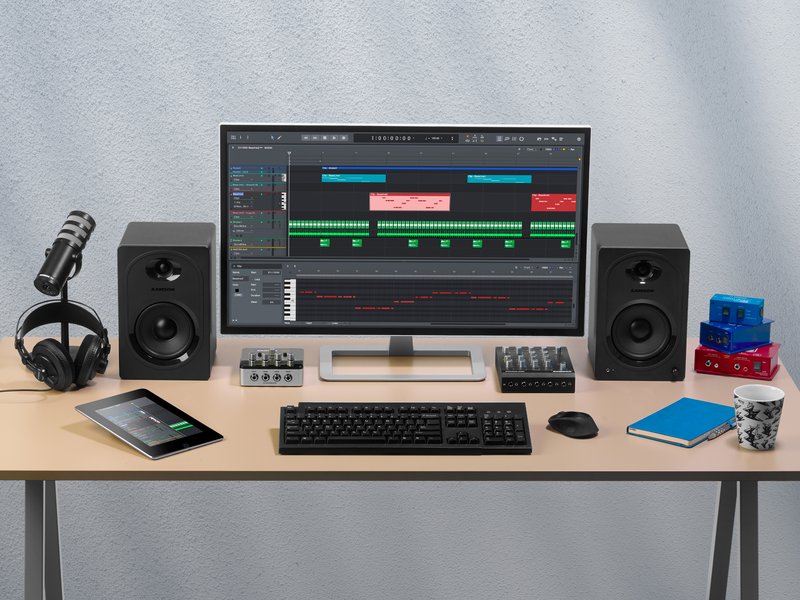
To get a clear picture of what your finished product will sound like, you’re going to want a good set of studio monitors and headphones. These will allow you to hear your recorded sound clearly, so you’ll be able to make proper judgements on volume levels and tone. A lot of folks don’t realize that the goal of studio monitors is not necessarily to sound ‘good’ but to sound ‘honest’. You want studio monitors that will reveal any flaws in the content that you’re mixing and editing so that you can fix them before declaring your project ‘finished’. With that said, finding a good pair of monitors with a flat frequency response will help you feel confident that the monitors aren’t ‘coloring’ your mix. This is important because you want to know that what you are hearing is also what your audience hears.
The Samson Resolv series studio monitors come in a variety of sizes, and they provide great stereo imaging to help you mix your audio. If you don’t have the space for larger speakers, the MediaOne series speakers can give you quite a bit of power in a smaller package. Either way, you’ll want to take a step up from the built-in speakers on your computer.
You’ll want to use headphones as well, because checking your final product on headphones is incredibly important! Besides being able to work while your significant other is asleep, headphones allow you to make sure what you’ve produced sounds great when your followers listen on a set of earbuds or something similar. Don’t forget — a significant amount of music and sound is consumed on standard headphones that come with a mobile device! While you may spend a lot of time mixing to make sure your tone sounds great on speakers, don’t ignore one of the most common ways media is consumed.
The Apps
We are lucky enough to live in a time with quite a few free choices for recording audio. If you’re using a Windows PC, you can’t go wrong with Audacity. This app will allow you to record your sound, tweak the tone, make any required edits, and export the finished product into a variety of formats. You can even edit the sound from a video you’ve recorded! For more advanced sound editing DaVinci Resolve still offers a free version with their Fairlight audio production suite included.
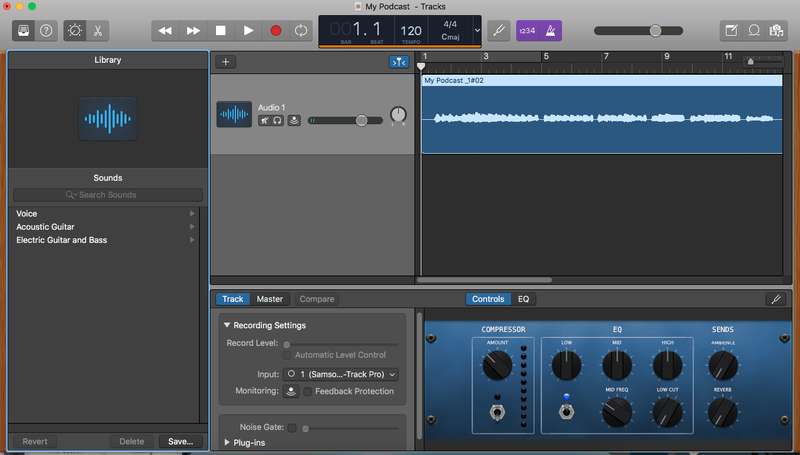
If you’re on a Mac, GarageBand is going to be your best choice. This app has templates set up for musicians, podcasters, and more. You can easily add effects, fix mistakes, and set volume levels to where they need to be without a large investment. Logic Pro X is Apple’s affordable Digital Audio Workstation software for advanced editing if you outgrow the features of GarageBand. As above with Windows, Audacity and DaVinci Resolve available for macOS as well.
About the Author